So you’ve mastered the basics and think you’re doing pretty well? Want to take your photography the next step? Looking for ways to improve? I have a few photography tips here which you may find useful! They’re not necessarily all specific to just landscape photography but should be applicable to most types of photography. I’m also not suggesting you necessarily need to do ALL these things but hopefully, they will at least provide you with something to think about!
Hopefully, with some of these tips, you can improve your shots and help get to that next level of photography ability.
Improve your histograms!
There’s no reason not to do this… a simple trick can greatly improve the accuracy of on-camera histograms. You might ask how? Hopefully, by now you have realised how useful the camera histogram is in determining whether your photo is exposed correctly. You don’t want to clip the shadows or blow the highlights of the photo and the histogram is incredibly important in determining this.
I presume you’re also shooting in RAW format rather than JPEG as there are countless good reasons to do so (especially with landscapes) and not many reasons not to. For more info about why you should be shooting RAW click here. Now… have you ever noticed that the image on the back of the camera looks different to when you import it into Lightroom (or similar editing software)? This is because what you are seeing on the camera is a preview JPEG rather than the RAW data itself. This means that the camera’s settings directly affect this image.
On Nikon, you have Picture Control settings and on Canon, you have Picture Styles. These affect the image’s sharpness, saturation, contrast and so on and directly impact what this preview JPEG looks like. However, unless you’re using Nikon/Canon’s proprietary software to read your RAW files then your software will ignore all these settings.
This isn’t a problem per se as it’s relatively easy to add some contrast, sharpness, saturation, etc. in post-processing. What is a slight issue however is the histogram which we use to determine if a photo is exposed correctly is based on the JPEG preview of the RAW image. This means the Picture Control/ Styles impact this histogram and can lead to a less accurate histogram than we could otherwise have.
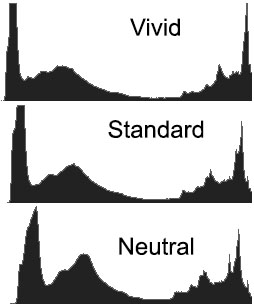
I’ve included an example here to show what a difference the different Picture Controls on a Nikon D800 have to the histogram. These are from 3 different RAWs taken of the exact same scene with the only variation being the Picture Control Settings.
You might ask what difference this makes in practice and potentially sometimes no difference. However, other times it might make the difference of being able to push the photo that extra third or half of a stop! Go with the ‘flattest’ Picture Control/ Style!
*Additional tip- While you’re at it, disable Active D-Lighting (Nikon)/ Auto Lighting Optimiser (Canon) too. This information is also not read by Lightroom, etc. and risks confusing the histogram. Again if using proprietary software to process your RAW images (e.g. Nikon Capture NX2) then you may want to ignore this!
Shoot a little wide!
Sometimes you may want to frame your photo just how you think looks perfect and then zoom out a couple of millimetres (or step back slightly). You might ask why but there are a number of good reasons why!
Perhaps during post-processing, you want to:
- Correct lens distortion
- Straighten the horizon (it happens to all of us!)
- Correct perspective (especially on verticals on buildings for example)
- Adjust image cropping
If you want to do any of these things and haven’t left any room to manoeuvre you might find you’re struggling to do so without cropping too close or spoiling your intended perfect composition.
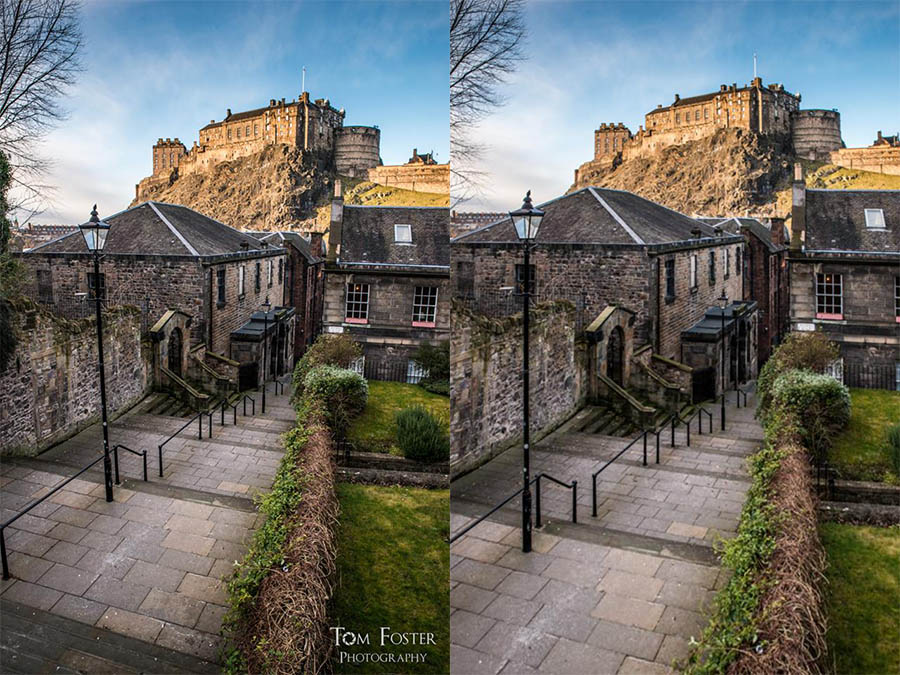
When I say ‘a little wide’, it doesn’t mean shoot everything at 10mm (or even close to that)! For example in the shot below on the left, I shot the photo a little wide to allow for some correction of the perspective in post-processing (right).
Don’t let the light get in on long exposures!
You’ve spent a decent amount of money on a dark 10-stop ND filter or a filter set and you fancy doing a few long exposures. As you might be sitting there for quite a few minutes this isn’t something you want to forget as it’s pretty annoying to have to shoot the shot again (and you might not always have the chance to do so)!
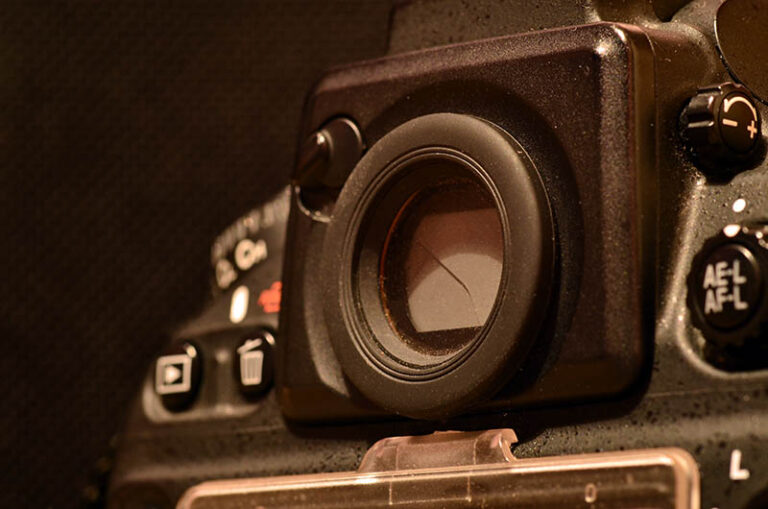
When shooting long exposure with an ND filter you’re trying to massively cut down on the light getting into the camera. We know about the light coming in through the lens but can tend to forget that isn’t the only way light gets into the camera. In some cameras, you might find that light also might sneak in through the viewfinder on the rear of the camera and spoil your hard work slowly over several minutes.
Don’t let this happen, if you have a viewfinder shutter then close it before you start exposing. If you don’t then cover the viewfinder with something. It doesn’t matter what you cover it with, just something to cut down on light entry. For the amount of time you might be sitting there (especially if using something like a 16-stopper), you can’t afford not to!
Make use of high-speed shutter!
You probably take most photos in single shot mode right? Unless bracketing for example. When taking photos handheld (or on a tripod even if not using a remote release) try taking 3 shots in a high-speed burst.
If you are shooting something with movement, by taking multiple photos you increase the chances of getting that perfect shot. Also, the act of pressing the shutter button can move the camera slightly and lead to a slightly soft picture so the second and third frames in the sequence may be sharper than the initial one.
I would not recommend doing this necessarily if you’re using film… unless you have a lot of money to burn and enjoy changing films.
Vignettes can be a good thing…but be careful
Don’t overdo vignettes! Vignettes aren’t always a bad thing. We often try to remove vignettes via correction tools and so on but often vignettes can add to a photo and can draw attention to the centre of the scene. Whether you like vignettes is down to personal taste whereas it is generally a good idea to correct other lens imperfections (such as chromatic aberration).
However, even if you want a vignette in the final finished photograph I believe it is still better practice often to correct the vignette and then re-apply the vignette. This is because if you have a vignette and crop the image at all then you risk the vignette being uneven across the frame. For example, a vignette at the top of the frame and not at the bottom would look odd.
So if you’re planning on cropping:
- Correct the vignette
- Crop and edit the image as desired
- Apply the post-crop vignette
However, don’t overdo it. Overly heavy vignetting does not look good. Oh and as for white vignettes… generally not a good idea!
Backup! Backup! Backup!
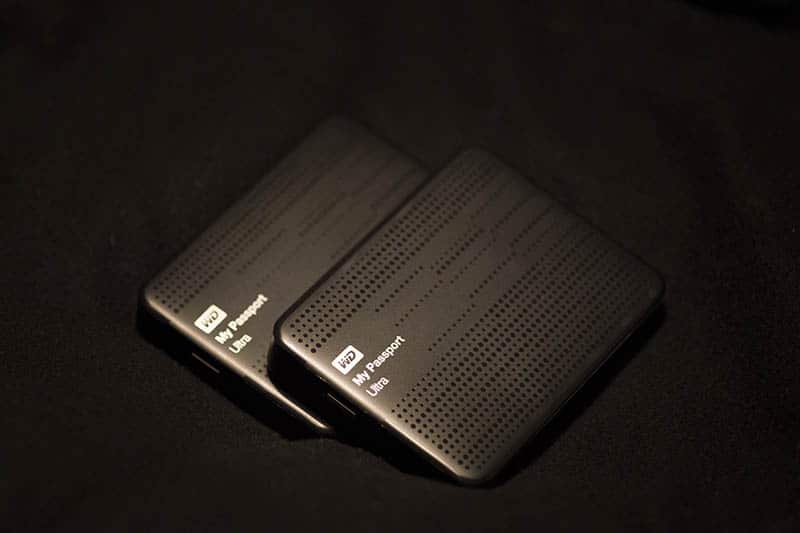
Not necessarily solely a photography tip, but more a life lesson and something that everyone should be doing. Also, don’t just keep one backup. If you’re serious about your photography (or even if not!) then I couldn’t imagine how devastating it would be to lose thousands and thousands of photos. For instance, my backups include:
- 3 External hard drives at my home (2 x HDD, 1 x SSD)
- 1 External hard drive at another location
- My important images are also saved online
You might say that’s excessive but it means that even in a disaster where all the backups at one location (unlikely) are lost then I still have all (or the vast majority of my data). Storage is cheap these days and you can never have too much redundancy in your backups! Do not put off backing up your images!
That’s all for now! Thanks very much for reading! If you have any other photography tips to add then please let me know in the comments below!
